| Author |
Message |
JoeReal
Site Admin


Joined: 16 Nov 2005
Posts: 4726
Location: Davis, California
|
| Posted: Mon 16 Apr, 2007 3:31 am |
|
I gave a quick seminar yesterday, April 14, 2007 at the Santa Clara Valley Chapter of the California Rare Fruit Grower. I promised the group a tutorial specific for citrus bark grafting, and so here it is.
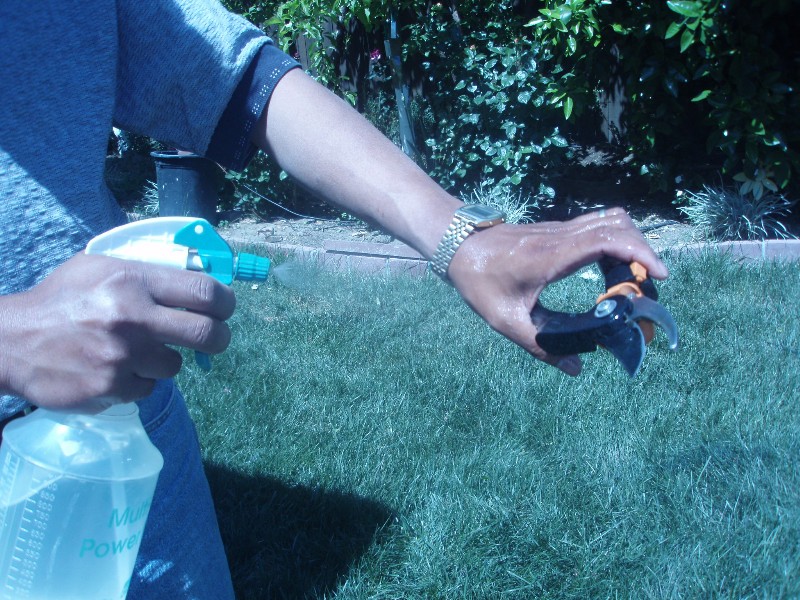
The very first step is to sterilize your equipments and your hands with 70% rubbing alcohol or ethanol. You can buy 1 liter container from Safeway or Long's drug and load it unto a hand held sprayer. The purpose here is to kill bacteria and fungi which can kill off your grafts. This will also help minimize spread of diseases if you are grafting several trees. You can also use lysol, but read the ingredients to make sure the alcohol content is at least 70%. Some lysol don't have alcohol in them, only bacteriocides.
 |
|
| Back to top |
|
 |
JoeReal
Site Admin


Joined: 16 Nov 2005
Posts: 4726
Location: Davis, California
|
| Posted: Mon 16 Apr, 2007 3:32 am |
|
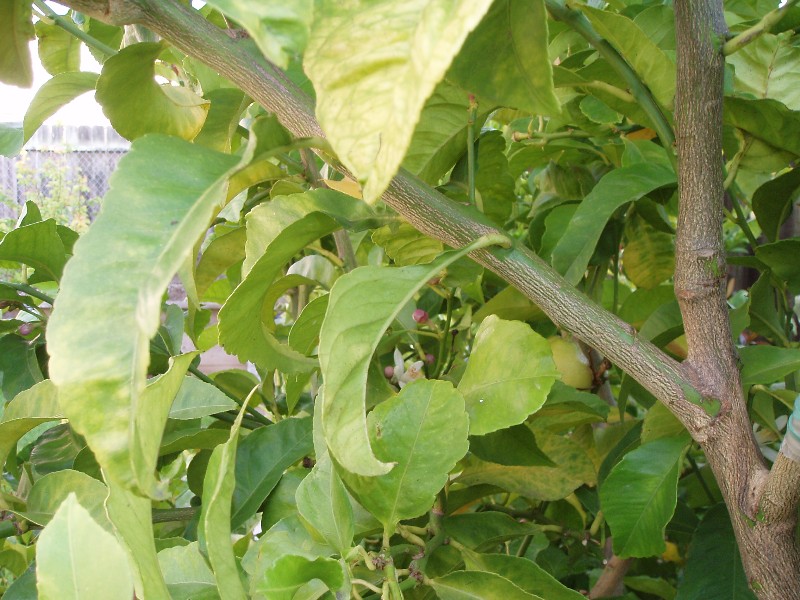
This is the branch that I am going to do a bark graft operation on.
 |
|
| Back to top |
|
 |
JoeReal
Site Admin


Joined: 16 Nov 2005
Posts: 4726
Location: Davis, California
|
| Posted: Mon 16 Apr, 2007 3:34 am |
|
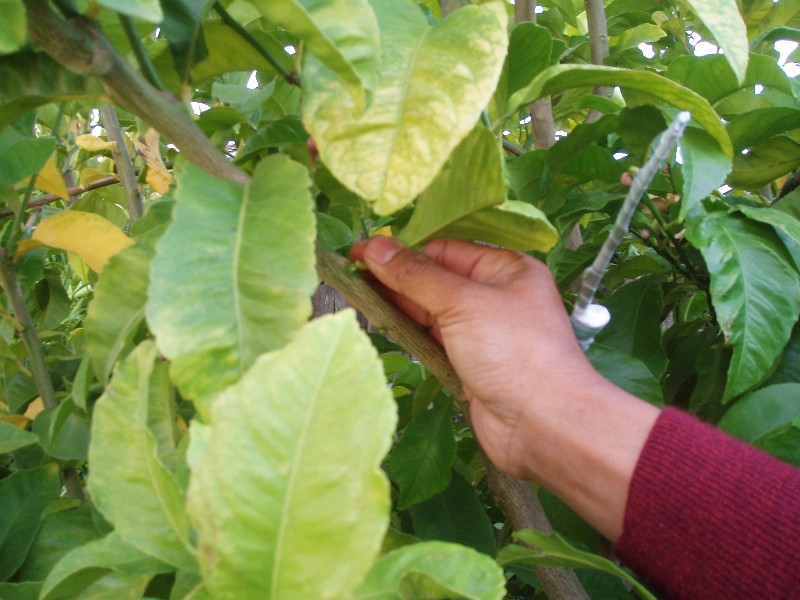
You will have to remove the leaves. Push the petioles sideways until it snaps. Do not pull off the leaves as it might pull away some of the bark. That is why pushing sideways is a good way to prevent pulling away some of the bark.
 |
|
| Back to top |
|
 |
JoeReal
Site Admin


Joined: 16 Nov 2005
Posts: 4726
Location: Davis, California
|
| Posted: Mon 16 Apr, 2007 3:35 am |
|
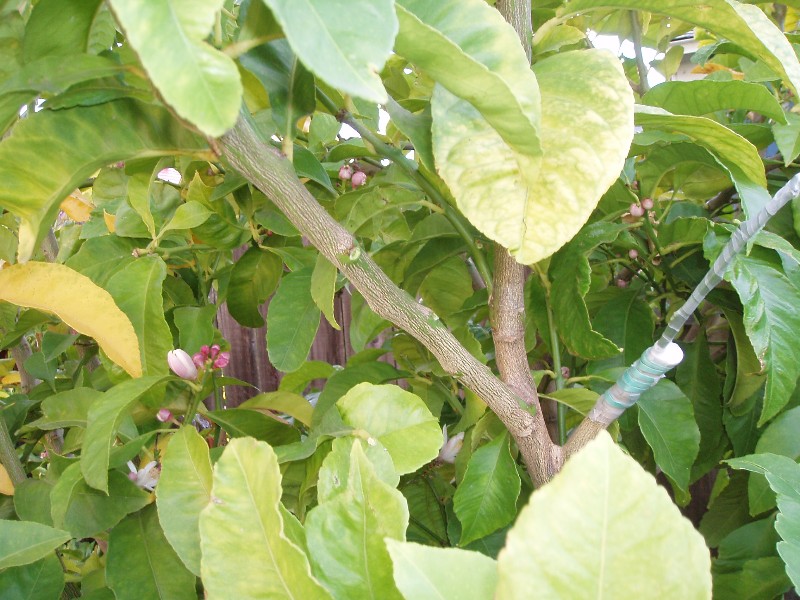
This is what it looks like after removing the leaves around the area where I intend to do the bark graft. If you look to your right, I have just finished a bark graft operation over there. That's how our bark graft should look like at the end.
 |
|
| Back to top |
|
 |
JoeReal
Site Admin


Joined: 16 Nov 2005
Posts: 4726
Location: Davis, California
|
| Posted: Mon 16 Apr, 2007 3:37 am |
|
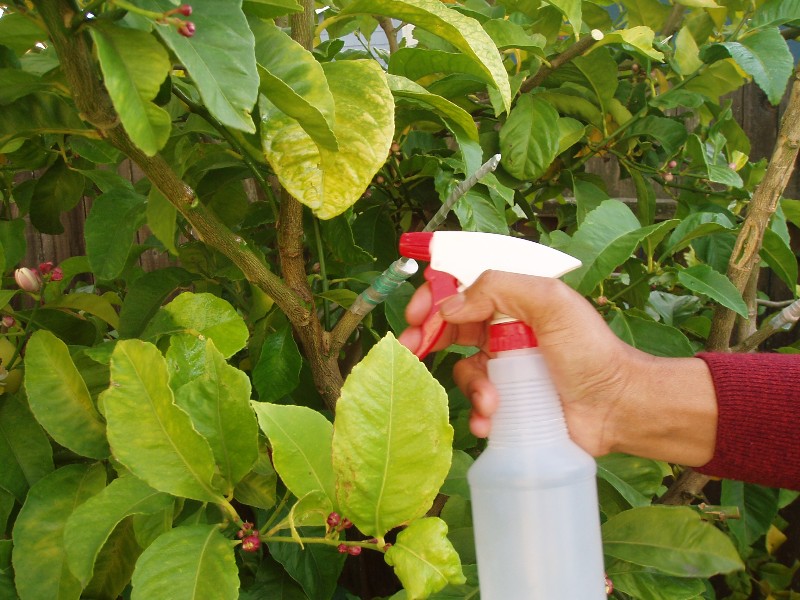
Now spray with alcohol around the branch that you just cleaned. We want to make sure that there are no fungal spores and bacteria alive that will otherwise damage our graft. Wait about a minute for the alcohol to dry a little bit.
 |
|
| Back to top |
|
 |
JoeReal
Site Admin


Joined: 16 Nov 2005
Posts: 4726
Location: Davis, California
|
| Posted: Mon 16 Apr, 2007 3:40 am |
|
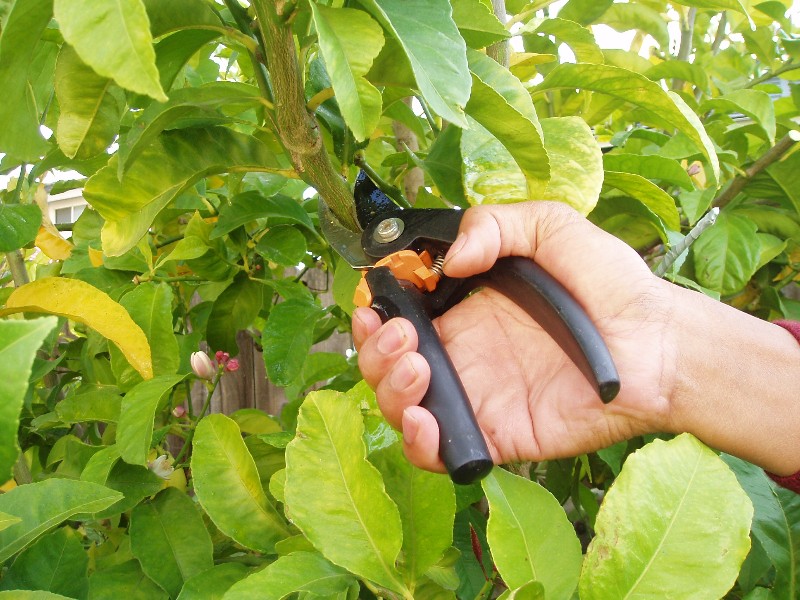
Then cut off where you want to do your bark graft. Make sure you have at least 4 inches of branch that you can insert a scionwood later. You would only need 2 inches in most cases, the other 2 inches if for allowances in case you make mistake.
 |
|
| Back to top |
|
 |
JoeReal
Site Admin


Joined: 16 Nov 2005
Posts: 4726
Location: Davis, California
|
| Posted: Mon 16 Apr, 2007 3:42 am |
|
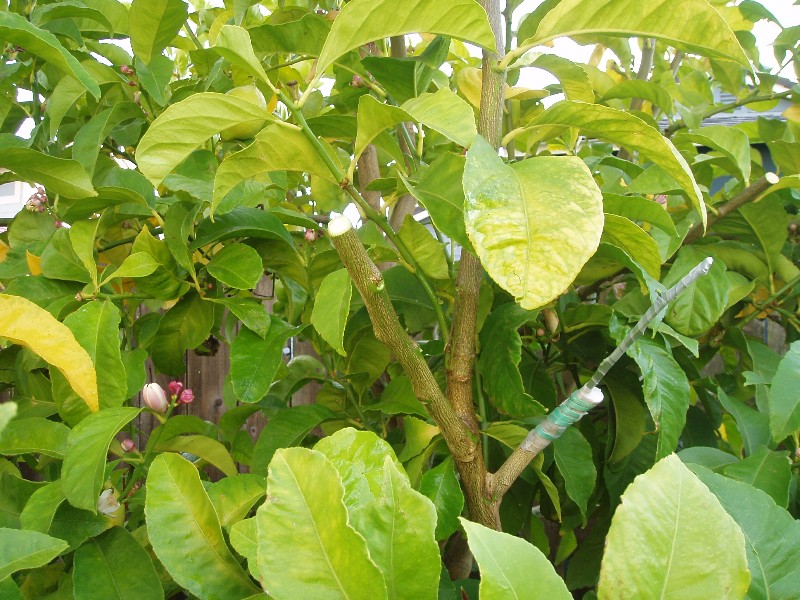
This is what it looks like after cutting the branch.
 |
|
| Back to top |
|
 |
JoeReal
Site Admin


Joined: 16 Nov 2005
Posts: 4726
Location: Davis, California
|
| Posted: Mon 16 Apr, 2007 3:44 am |
|
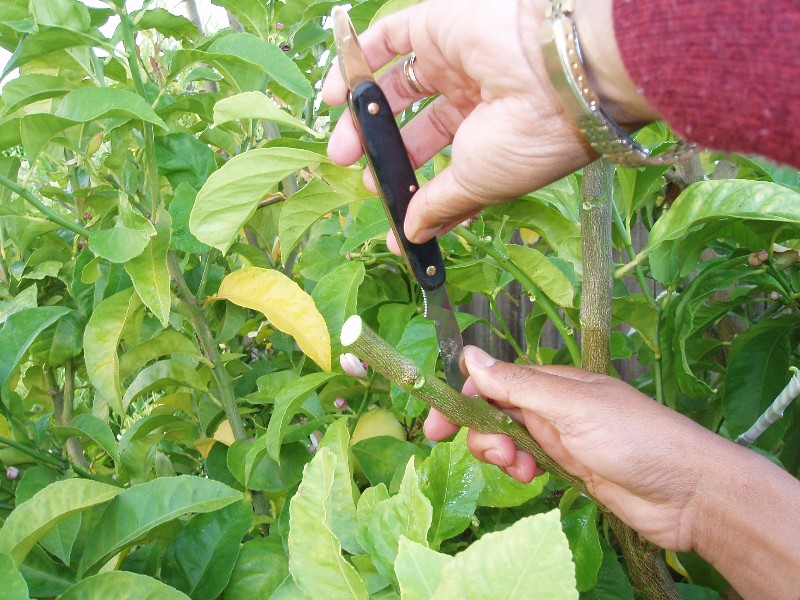
Then do the vertical cut. 2-3 inches would be nice, but it depends upon how big your scionwood budstick is. For a 1/4" diameter budstick, a 2" longitudinal cut along the branch is very good. Simply press the knife hard so that you cut through the bark and scratch off the wood underneath the bark. Just slide the knife up along the branch while pressing it down to slice the bark.
 |
|
| Back to top |
|
 |
JoeReal
Site Admin


Joined: 16 Nov 2005
Posts: 4726
Location: Davis, California
|
| Posted: Mon 16 Apr, 2007 3:46 am |
|
Then open the flaps of the bark after doing the vertical cut. Use the dull end of the grafting knife or you can use a bread knife or flat head screw driver to lift up the flap.
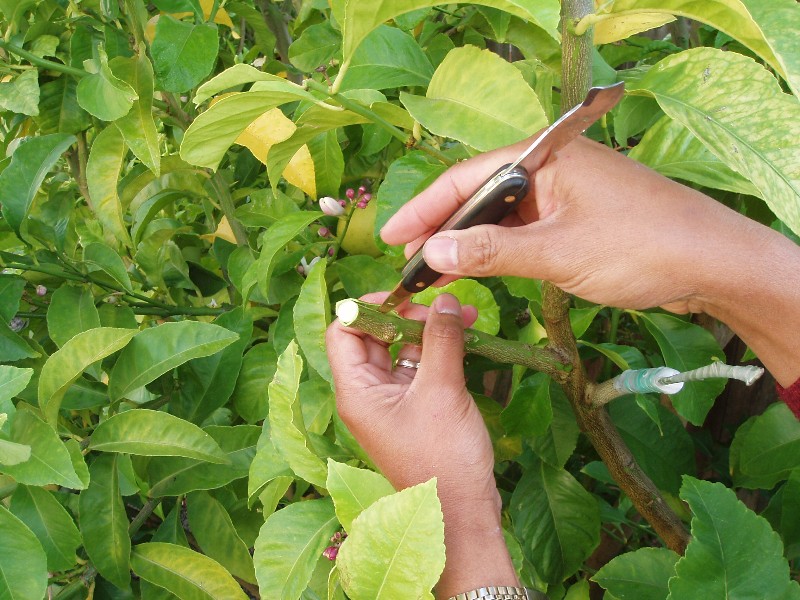
Do also the other side:
 |
|
| Back to top |
|
 |
JoeReal
Site Admin


Joined: 16 Nov 2005
Posts: 4726
Location: Davis, California
|
| Posted: Mon 16 Apr, 2007 3:48 am |
|
|
|
| Back to top |
|
 |
JoeReal
Site Admin


Joined: 16 Nov 2005
Posts: 4726
Location: Davis, California
|
| Posted: Mon 16 Apr, 2007 3:54 am |
|
The cut should be flat, do the best you can to make it flat by shaving off straight using your knife. You can do it even better than I did. Flat will have better contact. Sometimes, you may need to make it a little bit curve depending on the curvature of the destination branch. In most instances, a flat one is better to insert on a straight branch.
 |
|
| Back to top |
|
 |
JoeReal
Site Admin


Joined: 16 Nov 2005
Posts: 4726
Location: Davis, California
|
| Posted: Mon 16 Apr, 2007 3:57 am |
|
Now, don't forget this detail. Shave off a tiny portion of the edges of the lower half of your splice to expose the cambium layer. The lower portion of your splice will really be under the flaps and exposing the cambium layer for that purpose will help enhance take. Notice the tiny green shavings? Those are how small the trimmings on the edges you should do
 |
|
| Back to top |
|
 |
JoeReal
Site Admin


Joined: 16 Nov 2005
Posts: 4726
Location: Davis, California
|
| Posted: Mon 16 Apr, 2007 3:58 am |
|
Do also the other side, trim the edges very lightly
 |
|
| Back to top |
|
 |
JoeReal
Site Admin


Joined: 16 Nov 2005
Posts: 4726
Location: Davis, California
|
| Posted: Mon 16 Apr, 2007 3:59 am |
|
Take a look at the tip of the knife, I am pointing to the exposed cambium layer which will have direct contact on the cambiums of the destination bark flap.
 |
|
| Back to top |
|
 |
JoeReal
Site Admin


Joined: 16 Nov 2005
Posts: 4726
Location: Davis, California
|
| Posted: Mon 16 Apr, 2007 4:01 am |
|
I am just refining the trimmings to make it more uniform. the upper half of the splice cut, I did not trim those, although you can do it, they will usually not help that much in the contact.
 |
|
| Back to top |
|
 |


