 |
Citrus Growers Forum
This is the read-only version of the Citrus Growers Forum.
Breaking news: the Citrus Growers Forum is reborn from its ashes!
Citrus Growers v2.0
|
|
|
|
Cleft Grafting Tutorial
Goto 1, 2 Next
|
| Author |
Message |
JoeReal
Site Admin


Joined: 16 Nov 2005
Posts: 4726
Location: Davis, California
|
| Posted: Wed 18 Feb, 2009 9:20 pm |
|
Cleft Grafting.
(This tutorial used to be on the Epson website, but they're on tight budget, so they took it down)
Ideal during the dormant season when there's nothing else to do. Most preferable time is during rainless period. Excellent for Apples, Pears, Plums, pluots, plumcots during the dormant period. This kind of grafting can be done year round but with slight modifications during the hot months. Graft preferably after you treated (ie, sprayed) your tree against fungal diseases. Cleft grafting can be done on citruses, and Laaz have some pictures about such grafts. For the sake of illustration, I used a plum in this tutorial.
It's quite a feat to take pictures with one hand while doing the grafting, holding the knife, tape, scionwood and branch, balancing on ladder, when you only have two hands. So forgive me for some of the blurry pictures.
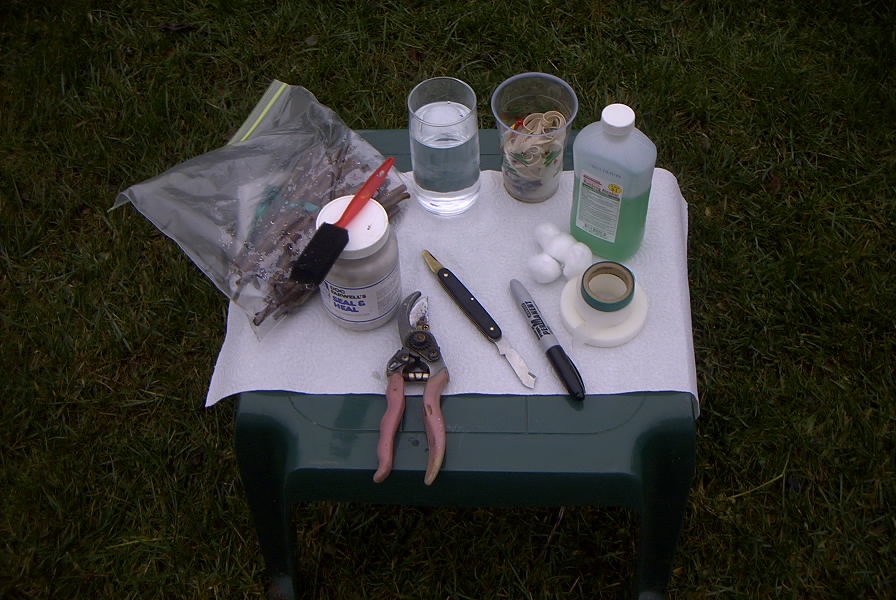
By joereal at 2009-02-18
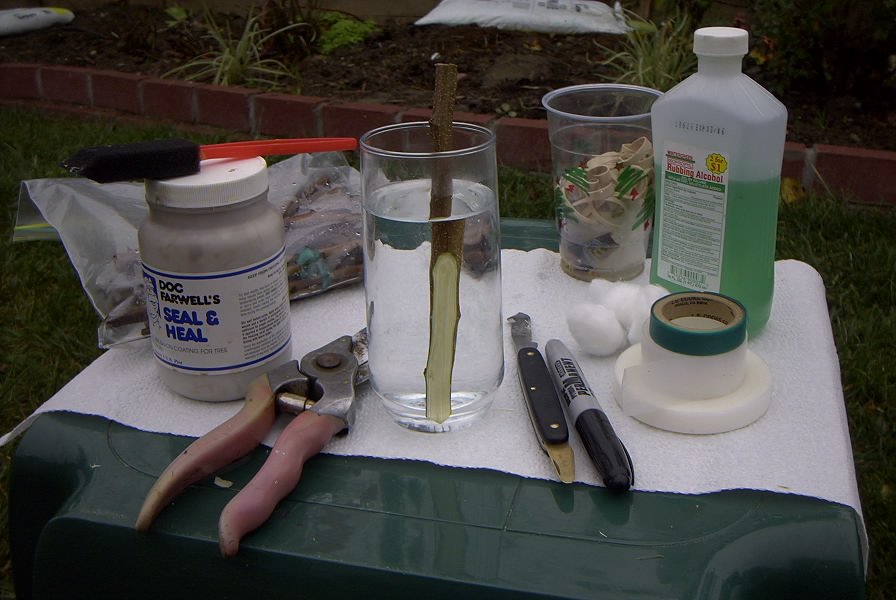
You would just need rubbing alcohol (70%), budding knife, grafting tape, rubber band and most importantly, the scionwood. When I started out, I took all measures to insure success that is why I also have Doc Farwell's graft sealer or paint, but I am messy with it, and it's more trouble to use by the likes of me, I just simply cover the scion and joints with grafting tape. In this demo, I painted the graft with Doc Farwell's sealer. Anyway should work for you. Start out by sterilizing the knife and pruning shear by wiping it with rubbing alcohol. Don't forget to rub your hands with alcohol also, it is good for masage to prepare you for the job. Instead of rubbing alcohol, you can also use lysol spray, the one that contains alcohol. But for me, I would use whatever is available sterilizer, and whatever is cheaper, they work equally well. |
|
| Back to top |
|
 |
JoeReal
Site Admin


Joined: 16 Nov 2005
Posts: 4726
Location: Davis, California
|
| Posted: Wed 18 Feb, 2009 9:20 pm |
|
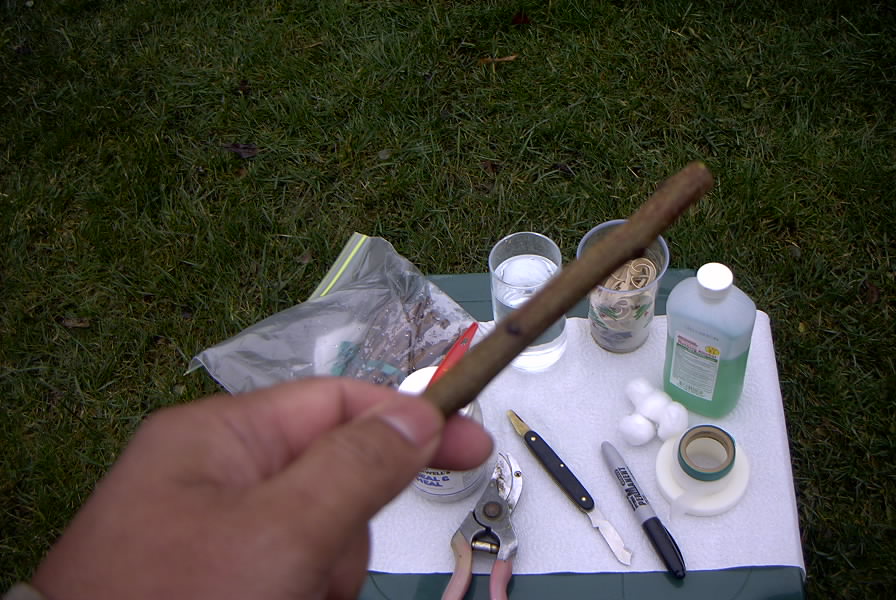
By joereal at 2009-02-18
Select scionwood stick that is comfortable to work with. You should also have some idea where to graft on the tree, and scout for the destination diameter branch, and so select the scionwood that matches closely to the destination diameter branch. Usually, pencil sized diameter scionwood about 6 to 8 inches long are excellent for plum grafting on existing mature tree. If you are grafting on a seedling, you select smaller diameter. I have grafted scionwood that are as small as 1/8" caliper, to scionwood that are larger than 1", and they're successful. But if you have a choice, the 1/4" to 1/2" diameter, with 3/8" diameter being my favorite, and most easy to work with when it comes to grafting. |
|
| Back to top |
|
 |
JoeReal
Site Admin


Joined: 16 Nov 2005
Posts: 4726
Location: Davis, California
|
| Posted: Wed 18 Feb, 2009 9:21 pm |
|
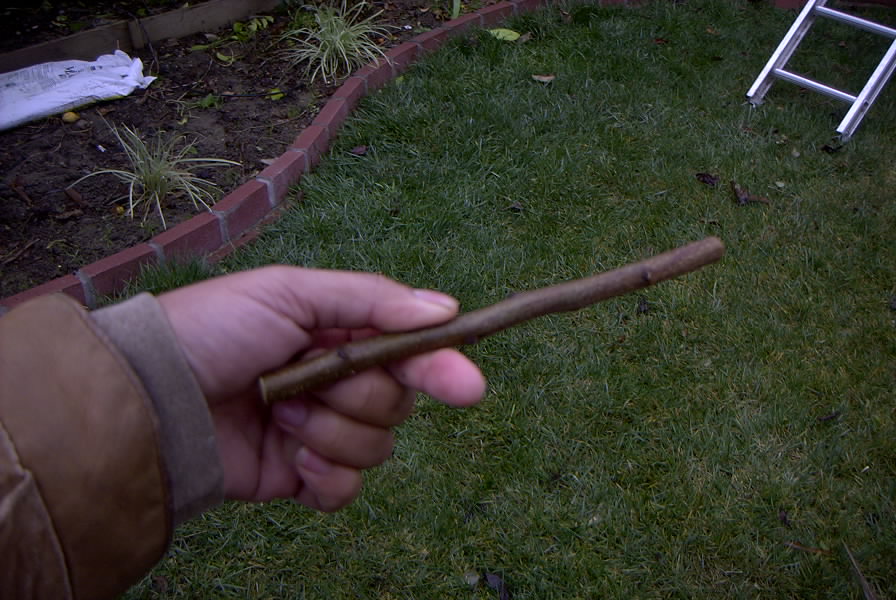
By joereal at 2009-02-18
This is about 8" long stick, about 1/2 inch diameter, which is about the size diameter of destination branch. |
|
| Back to top |
|
 |
JoeReal
Site Admin


Joined: 16 Nov 2005
Posts: 4726
Location: Davis, California
|
| Posted: Wed 18 Feb, 2009 9:21 pm |
|
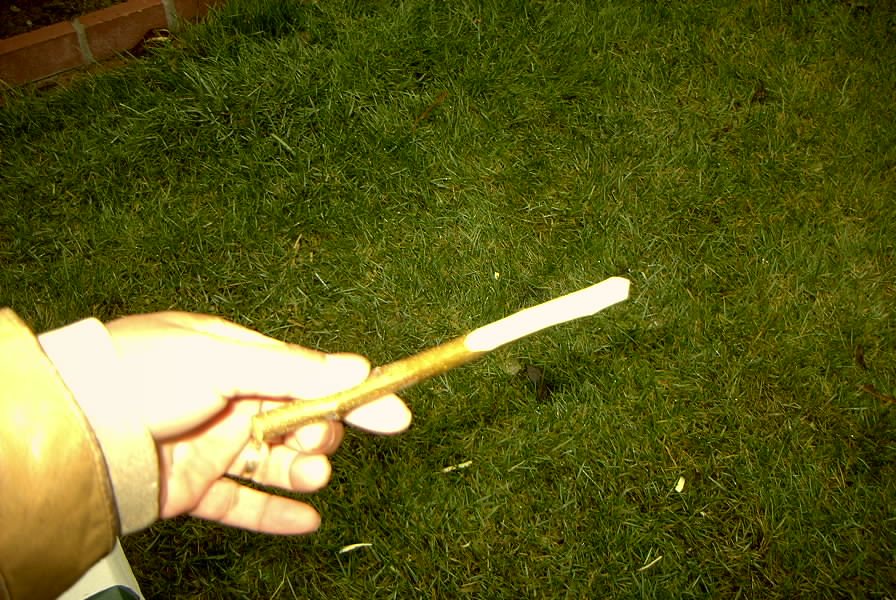
By joereal at 2009-02-18
First cut-off about 1/2" from both ends of the scionwood to remove the dirty ends. Then hold the stick and whittle away at the other end, make sure to whittle at both sides to form wedge. The recommended length of the wedge is at least 2", and if you can make it longer, so much the better, in my case, about 3". The wedge should taper nicely. |
|
| Back to top |
|
 |
JoeReal
Site Admin


Joined: 16 Nov 2005
Posts: 4726
Location: Davis, California
|
| Posted: Wed 18 Feb, 2009 9:22 pm |
|

By joereal at 2009-02-18
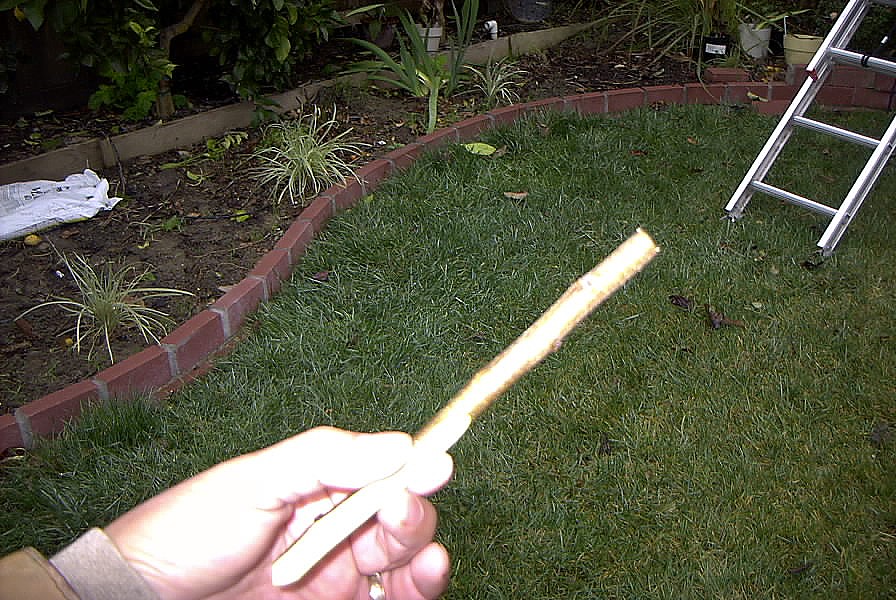
Here's how the wedge looks like once it is done. About 3" inch tapered wedge. The planes on the wedge should be as flat as you can make it. It may not be perfect, but it will take, it is jus that the flatter you make the sides of the wedge, the easier they are to work with.
So sometimes, this is called wedge grafting by some hobbyists. |
|
| Back to top |
|
 |
JoeReal
Site Admin


Joined: 16 Nov 2005
Posts: 4726
Location: Davis, California
|
| Posted: Wed 18 Feb, 2009 9:23 pm |
|
By joereal at 2009-02-18
Here's the finished product, ready for insertion. All we need is a destination cleft to insert this prepared scionwood. |
|
| Back to top |
|
 |
JoeReal
Site Admin


Joined: 16 Nov 2005
Posts: 4726
Location: Davis, California
|
| Posted: Wed 18 Feb, 2009 9:23 pm |
|
By joereal at 2009-02-18
To prevent the scionwood from drying, you can keep it submerged in clean water, preferrably distilled bottled water to make sure it is sterile or nearly so. You can add small amount, as in a few drops of liquid or gel (make sure to stir to melt away the gel, powdered forms are usually not soluble so I don't recommend them) rooting hormone into the water, it will help out in the calousing and your chances of take. Let it stay there while you prepare the cleft on the destination branch. |
|
| Back to top |
|
 |
JoeReal
Site Admin


Joined: 16 Nov 2005
Posts: 4726
Location: Davis, California
|
| Posted: Wed 18 Feb, 2009 9:24 pm |
|
By joereal at 2009-02-18
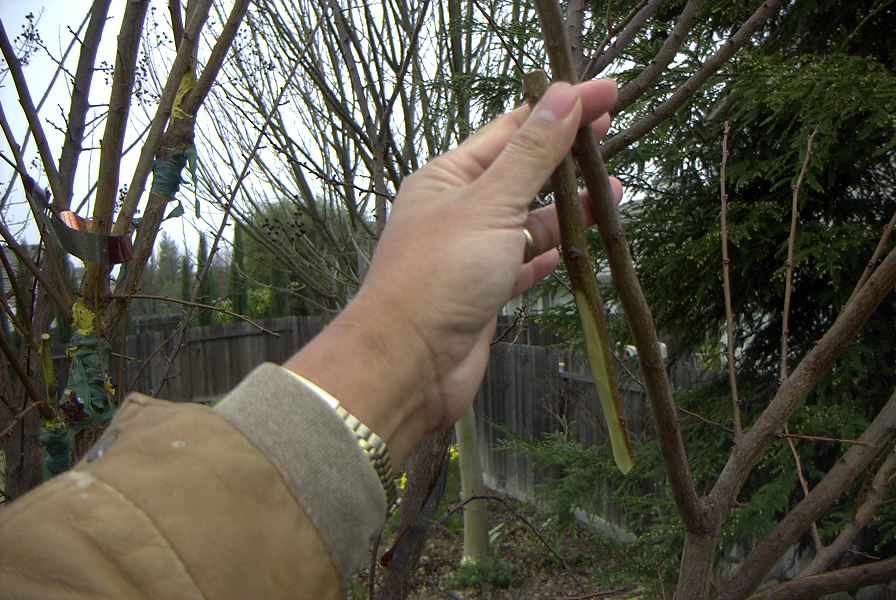
Ahh, the destination branch that matches closely with the diameter of my scionwood stick. I selected this before I did the graft, and am just moving the scionwood up or down to find the section that closely matches the diameter, without exceeding one foot away from the main branch. |
|
| Back to top |
|
 |
JoeReal
Site Admin


Joined: 16 Nov 2005
Posts: 4726
Location: Davis, California
|
| Posted: Wed 18 Feb, 2009 9:24 pm |
|
By joereal at 2009-02-18
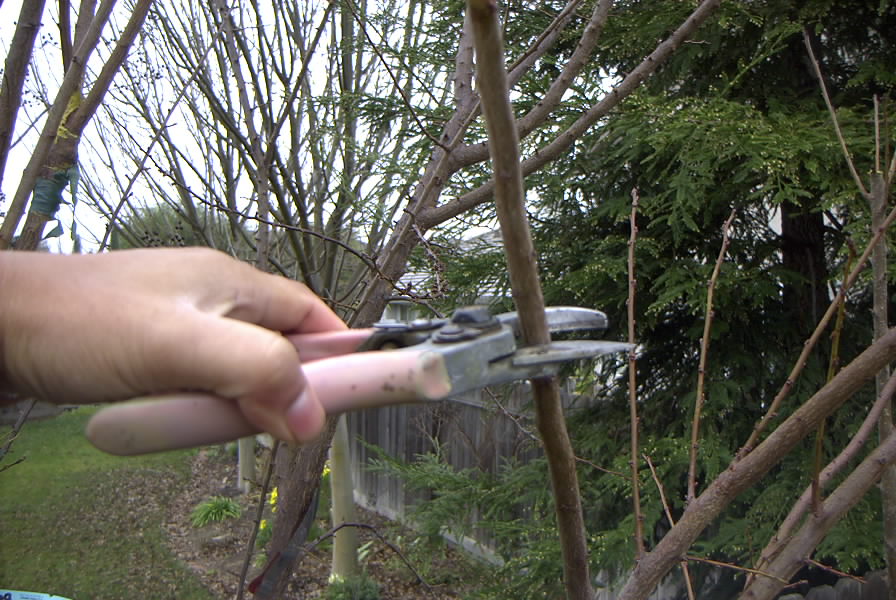
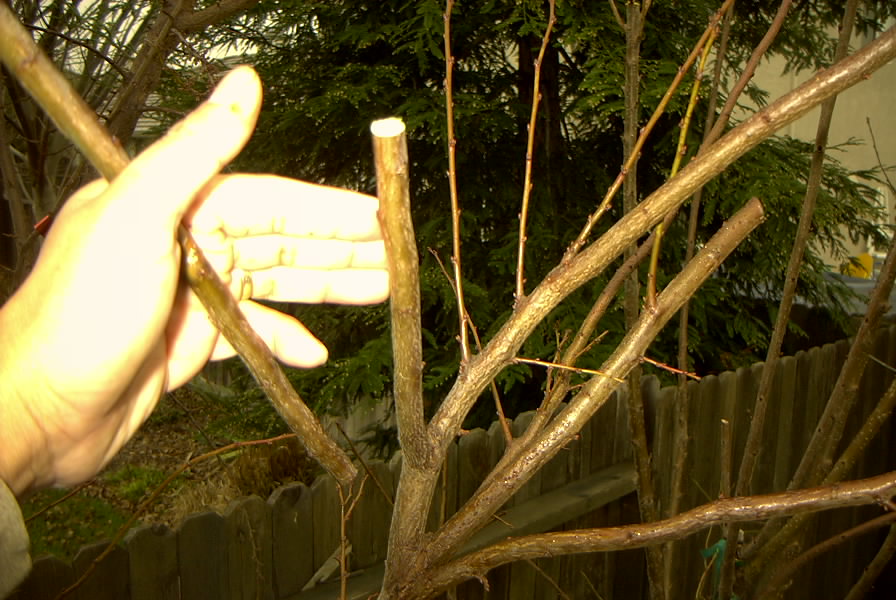
Cut away the destination branch, make sure the cut is perpendicular to the axis of the branch.
By joereal at 2009-02-18
Here's that perpendicular cut. |
|
| Back to top |
|
 |
JoeReal
Site Admin


Joined: 16 Nov 2005
Posts: 4726
Location: Davis, California
|
| Posted: Wed 18 Feb, 2009 9:25 pm |
|
By joereal at 2009-02-18
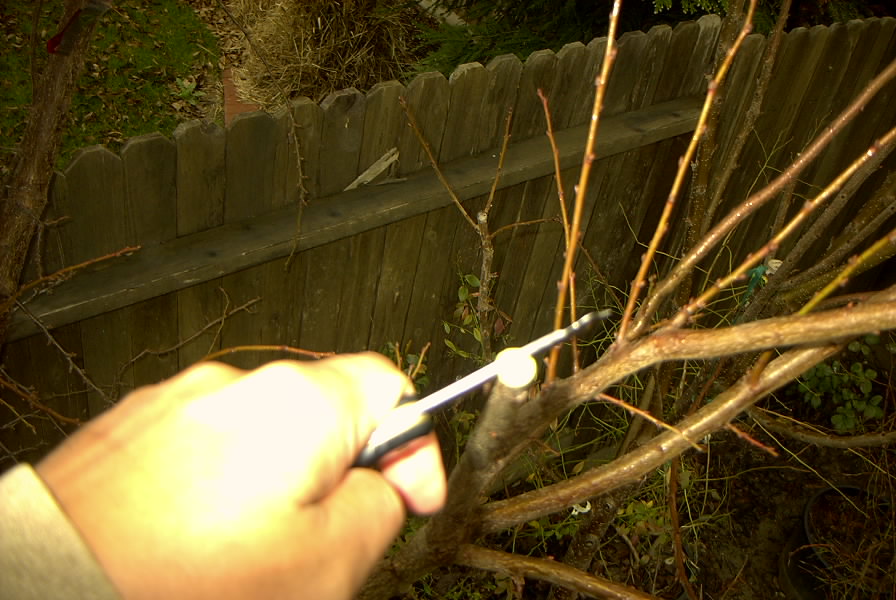
Position your knife in the middle of the top of the cut branch and work your way down. Keep the knife pointed towards the main trunk. You can do other positioning, but this one is often the easiest to do.
By joereal at 2009-02-18
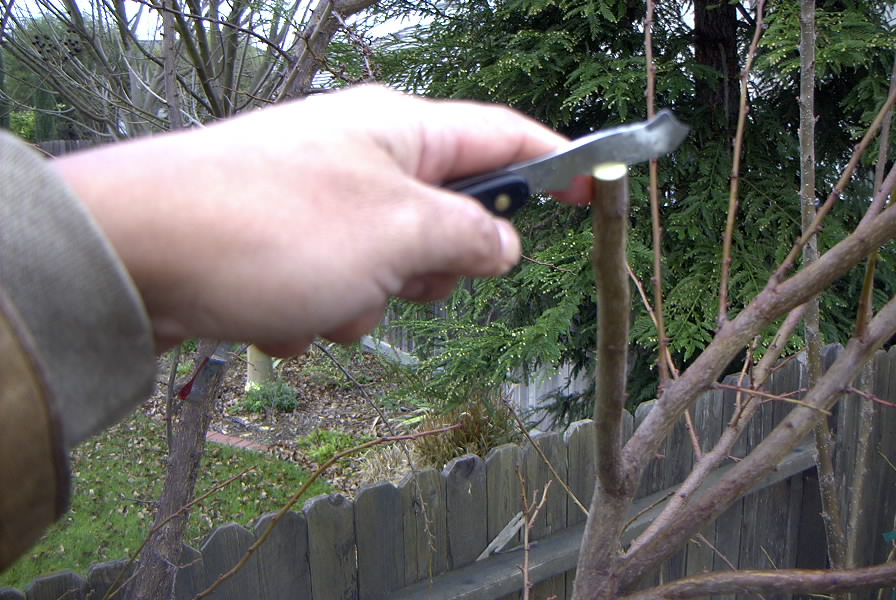
You start cutting a cleft by rocking the knife back and forth while applying downward force, or you can pound gently the other end with a rubber mallet. But this one is easy, I can do it with my left hand while the right hand holds the camera to take the picture. |
|
| Back to top |
|
 |
JoeReal
Site Admin


Joined: 16 Nov 2005
Posts: 4726
Location: Davis, California
|
| Posted: Wed 18 Feb, 2009 9:25 pm |
|
By joereal at 2009-02-18
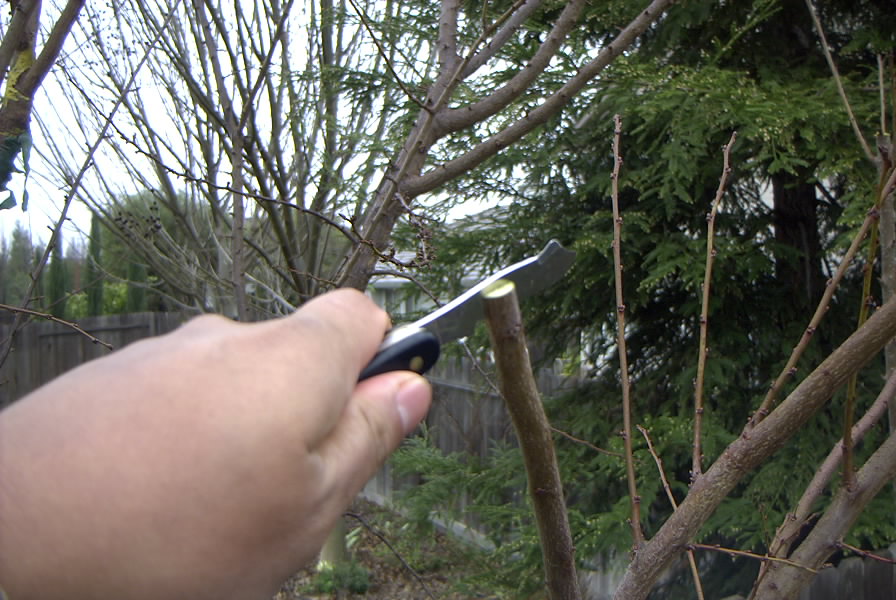
Gently going down, no need to hurry. If you hurry, the knife would easily slip and slice away a chuck of the branch, or worst, you would cut yourself if you're not careful. So gently rock back forth to open the cleft.
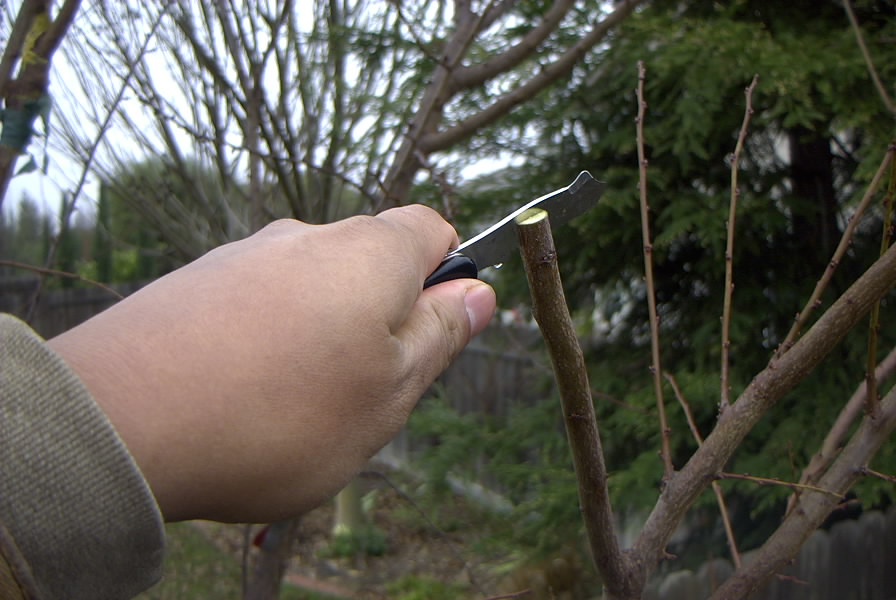
By joereal at 2009-02-18
Almost there!
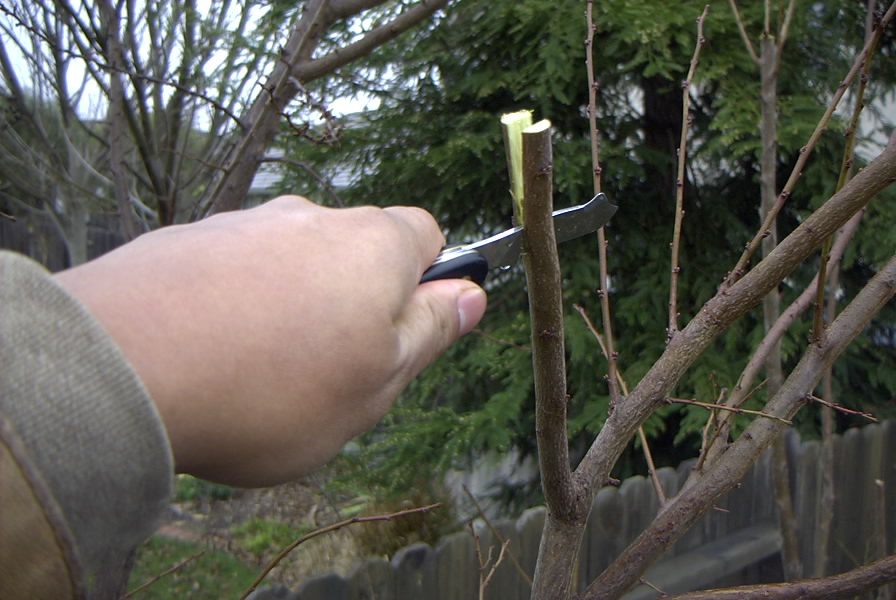
By joereal at 2009-02-18
And some more. Make a cleft that is an inch deeper than the wedge you prepared.
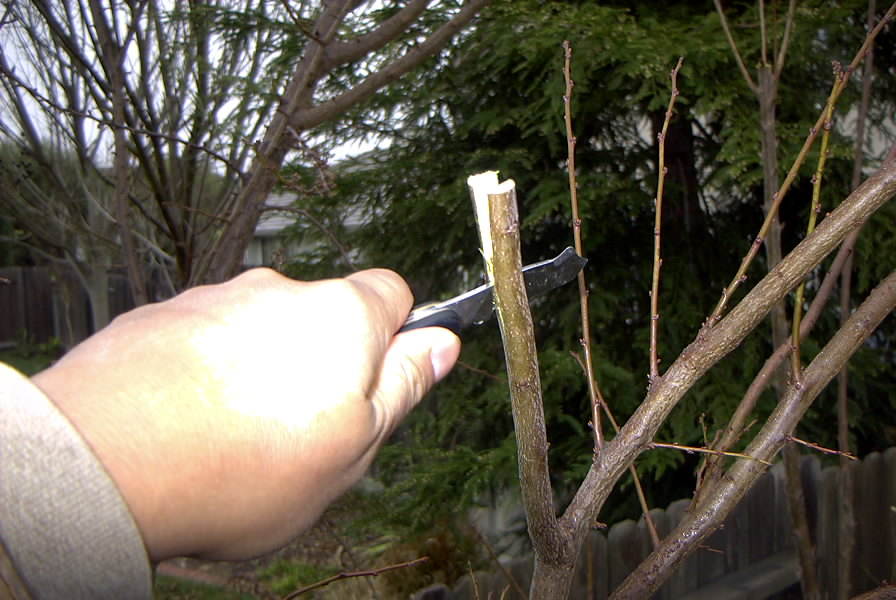
By joereal at 2009-02-18
And here's that cleft, ready to accept the scionwood. That is why they call this Cleft grafting. |
|
| Back to top |
|
 |
JoeReal
Site Admin


Joined: 16 Nov 2005
Posts: 4726
Location: Davis, California
|
| Posted: Wed 18 Feb, 2009 9:27 pm |
|
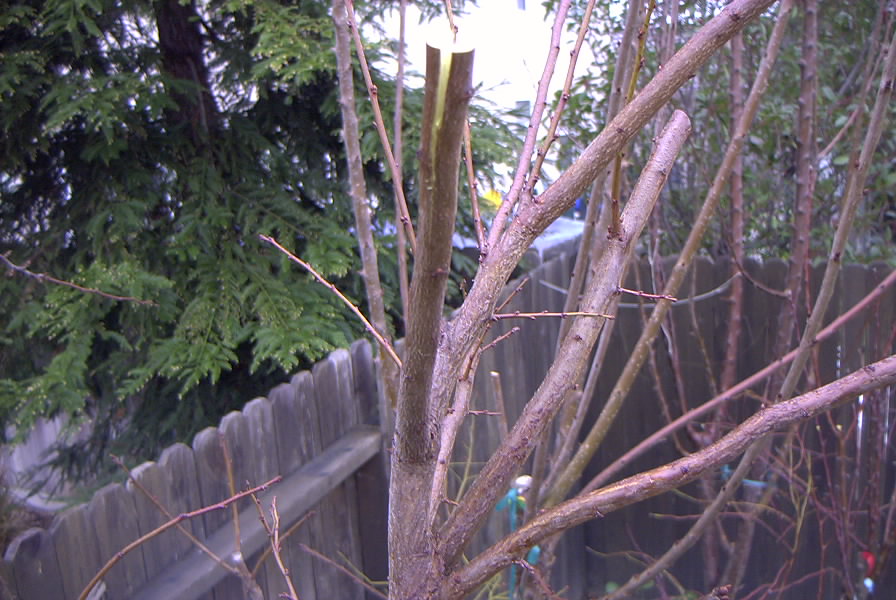
By joereal at 2009-02-18
Insert the scionwood as shown. Gently press it down, never in a hurry. Or you could ruin the scionwood with too much force, ie, its bark ripped out from the wedge. |
|
| Back to top |
|
 |
JoeReal
Site Admin


Joined: 16 Nov 2005
Posts: 4726
Location: Davis, California
|
| Posted: Wed 18 Feb, 2009 9:29 pm |
|
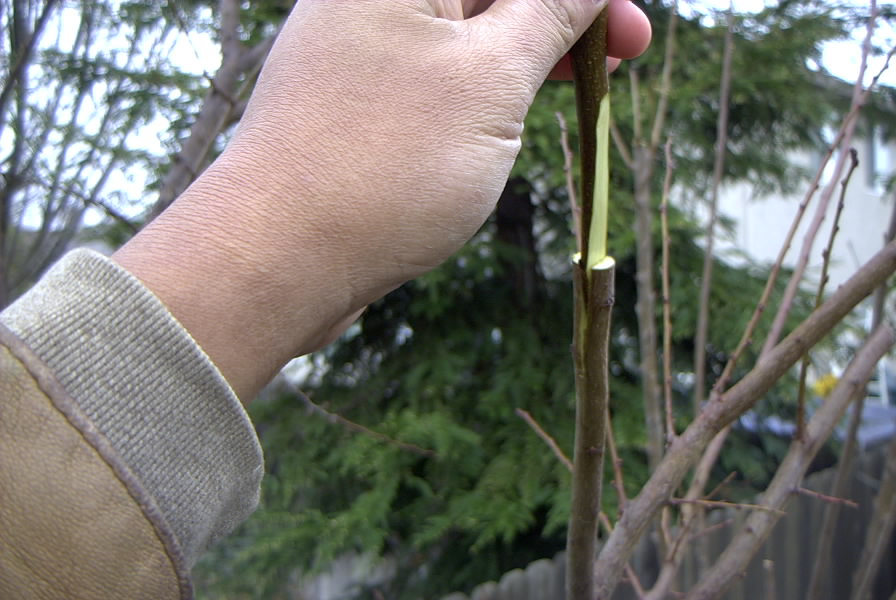
By joereal at 2009-02-18
Make your way down, slowly
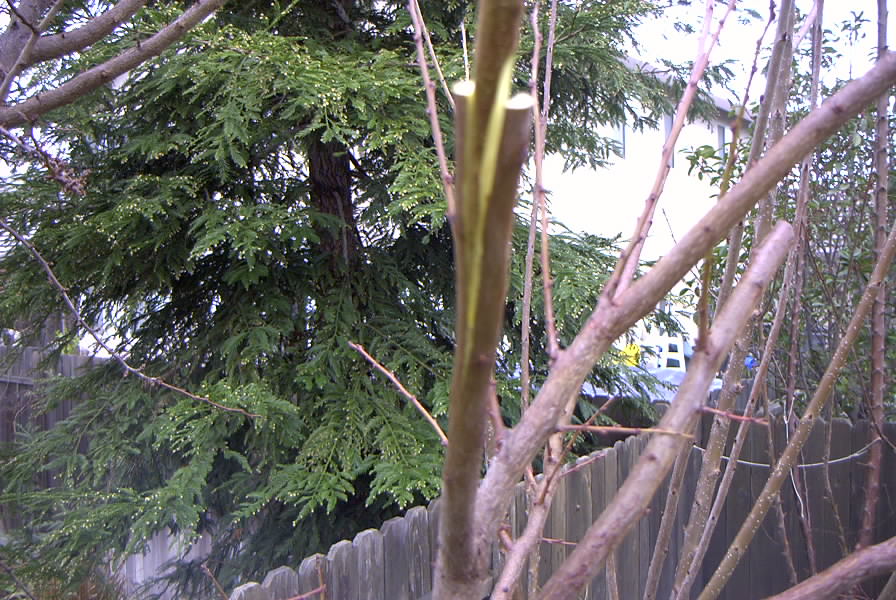
By joereal at 2009-02-18
Almost there!
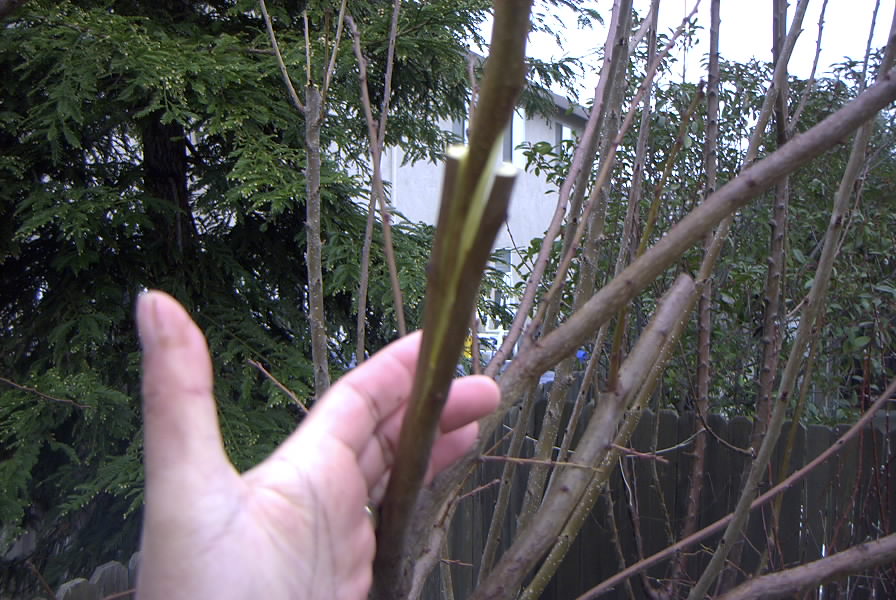
By joereal at 2009-02-18
And finally done inserting! Notice that some of the white sides of the cut will be exposed, but that's small portion, and would callouse over through time. |
|
| Back to top |
|
 |
JoeReal
Site Admin


Joined: 16 Nov 2005
Posts: 4726
Location: Davis, California
|
| Posted: Wed 18 Feb, 2009 9:29 pm |
|
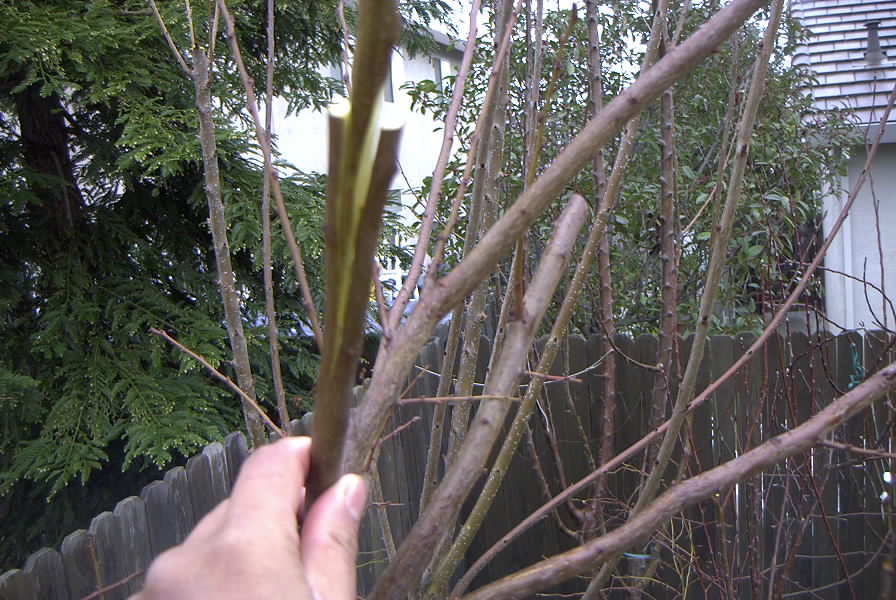
By joereal at 2009-02-18
Inspect one more time to be sure that no debris nor dirt got trapped at the bottom of the cleft, if so, remove the scionwood, remove the debris, and then re-insert. |
|
| Back to top |
|
 |
JoeReal
Site Admin


Joined: 16 Nov 2005
Posts: 4726
Location: Davis, California
|
| Posted: Wed 18 Feb, 2009 9:29 pm |
|
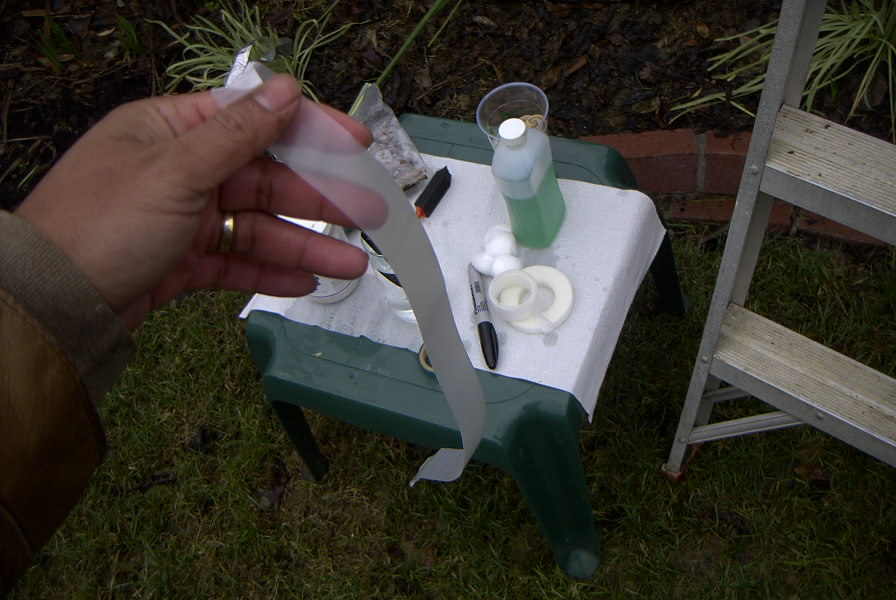
By joereal at 2009-02-18
Then take about a foot of the grafting tape. |
|
| Back to top |
|
 |
| Informations |
 |
Our users have posted a total of 66068 messages
We have 3235 registered members on this websites
|
| Most users ever online was 70 on Tue 30 Oct, 2012 10:12 am |
Powered by phpBB © 2001, 2005 phpBB Group
|
|


